
Hana | The Real Side Of DIY
Hana | The Real Side Of DIY is one of the top Business influencer in Canada with 526212 audience and 9.8% engagement rate on Instagram. Check out the full profile and start to collaborate.
526.2k
AudienceAudience
9.8%
Engagement
Niche categories
Business
Home / Garden
Parents/Kids
Portfolio
Standout projects making waves around the web
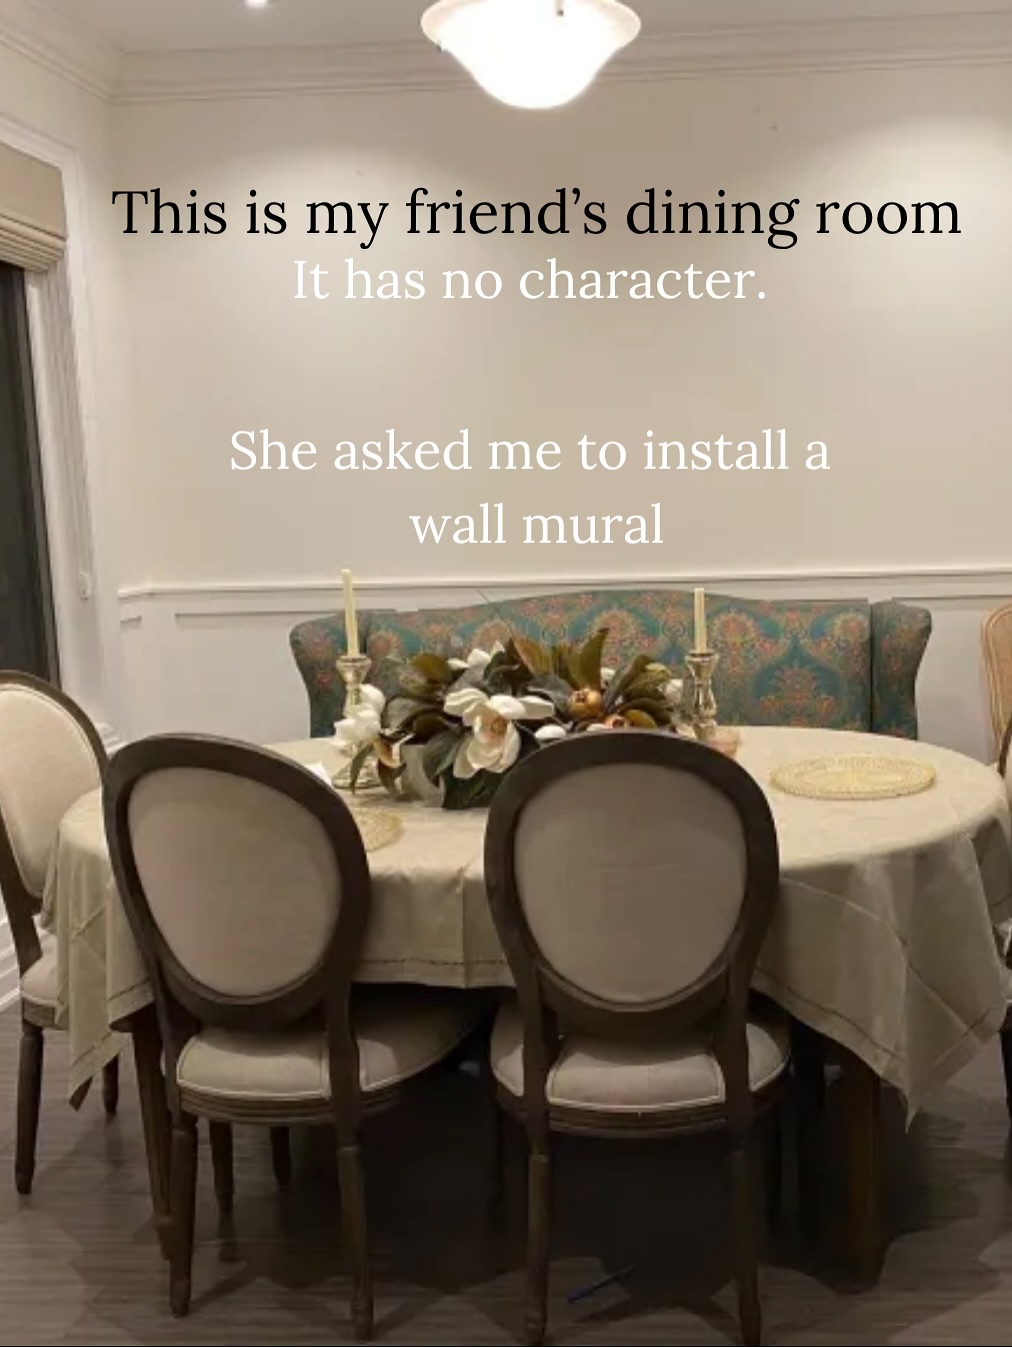
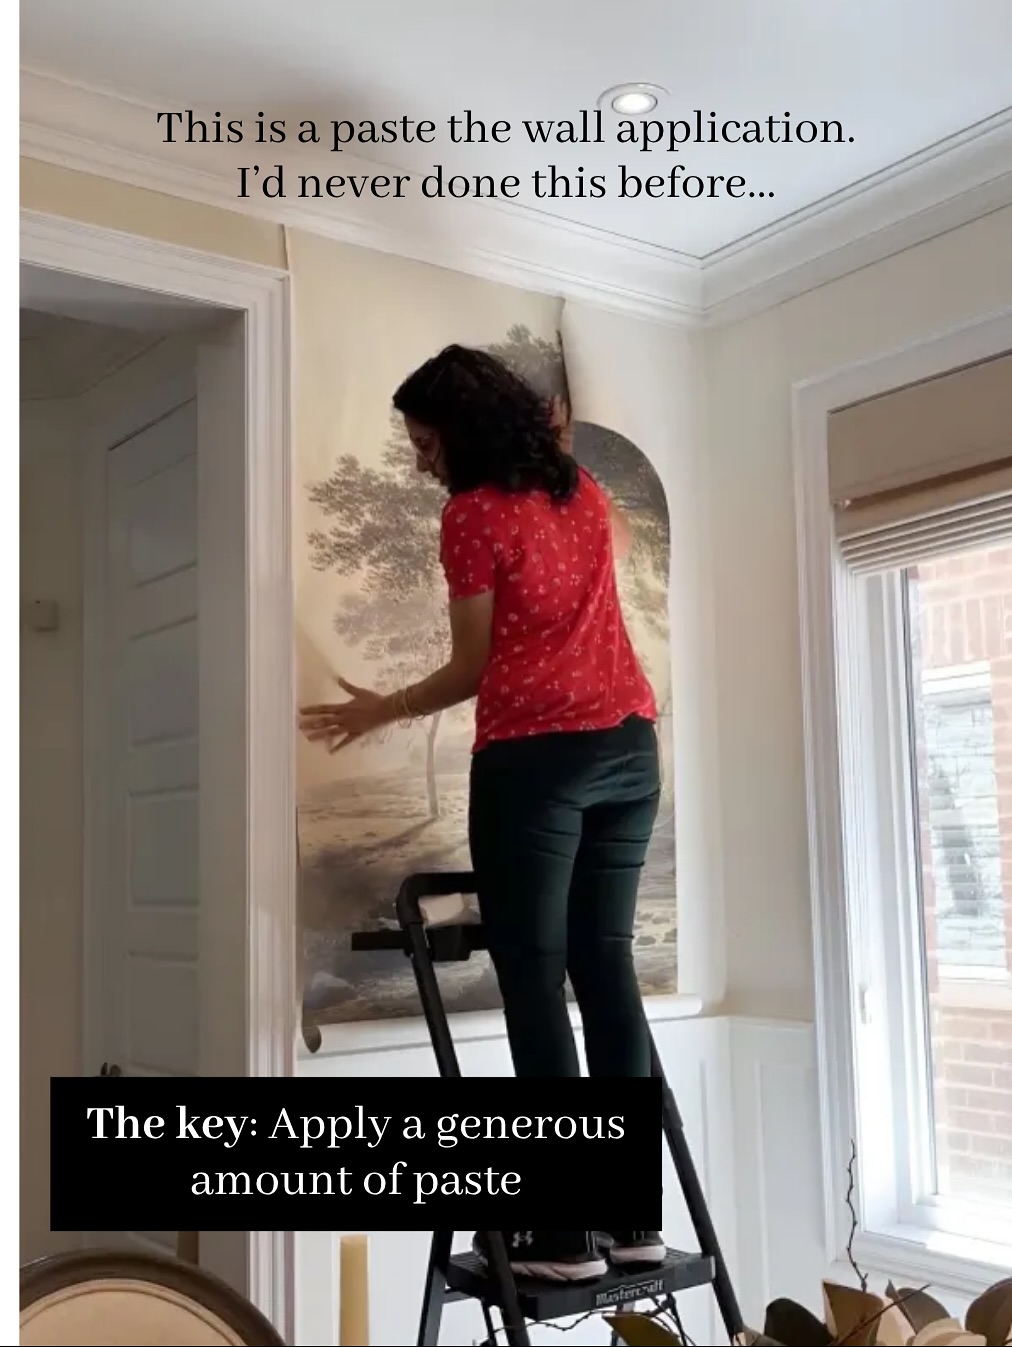
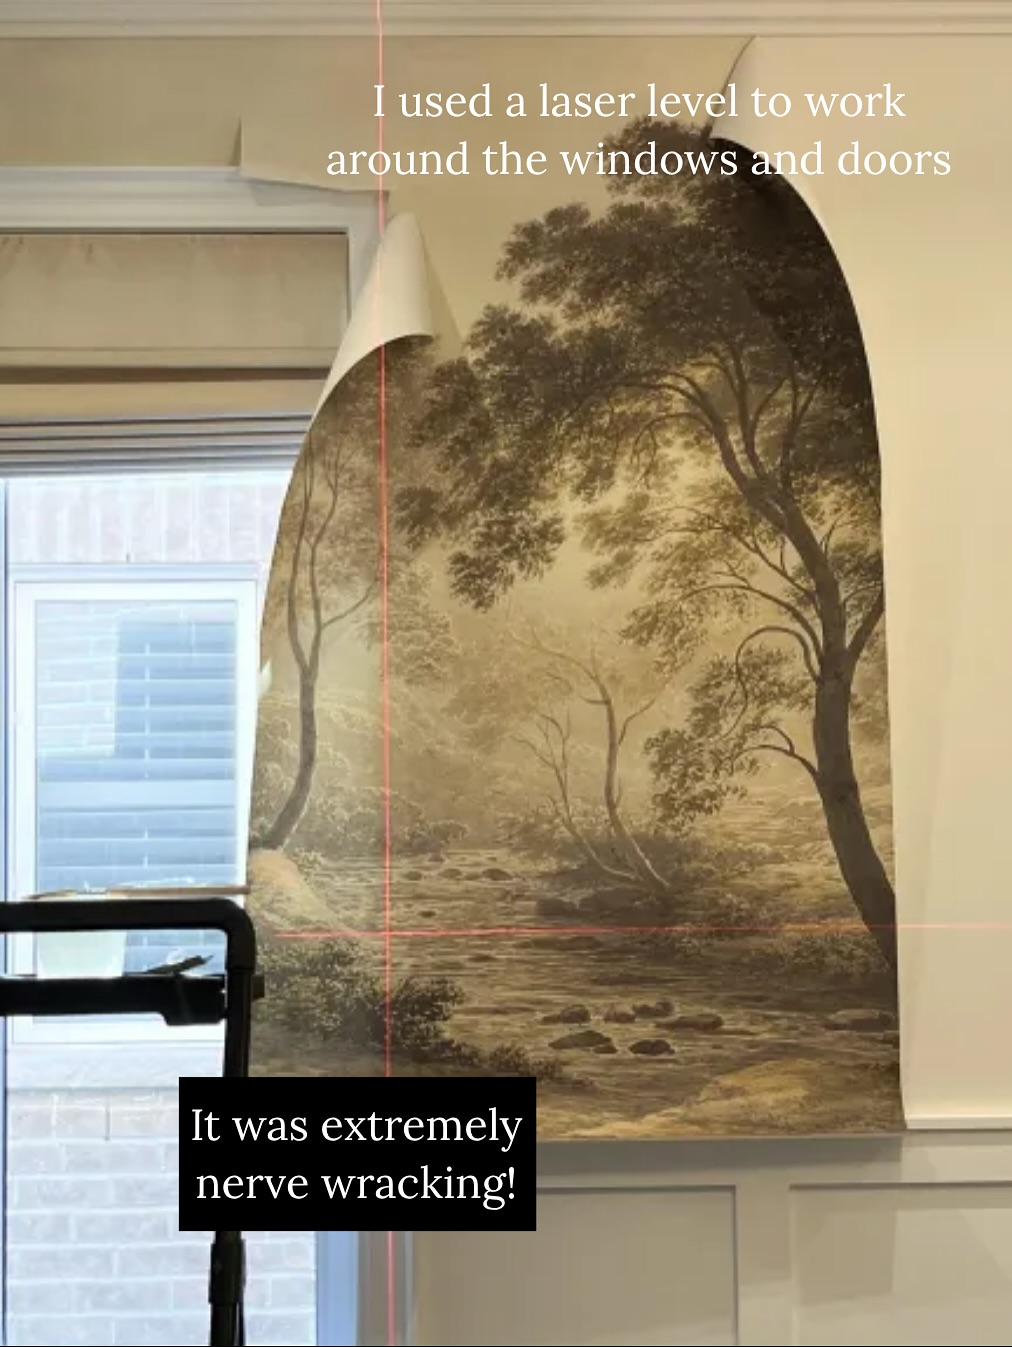
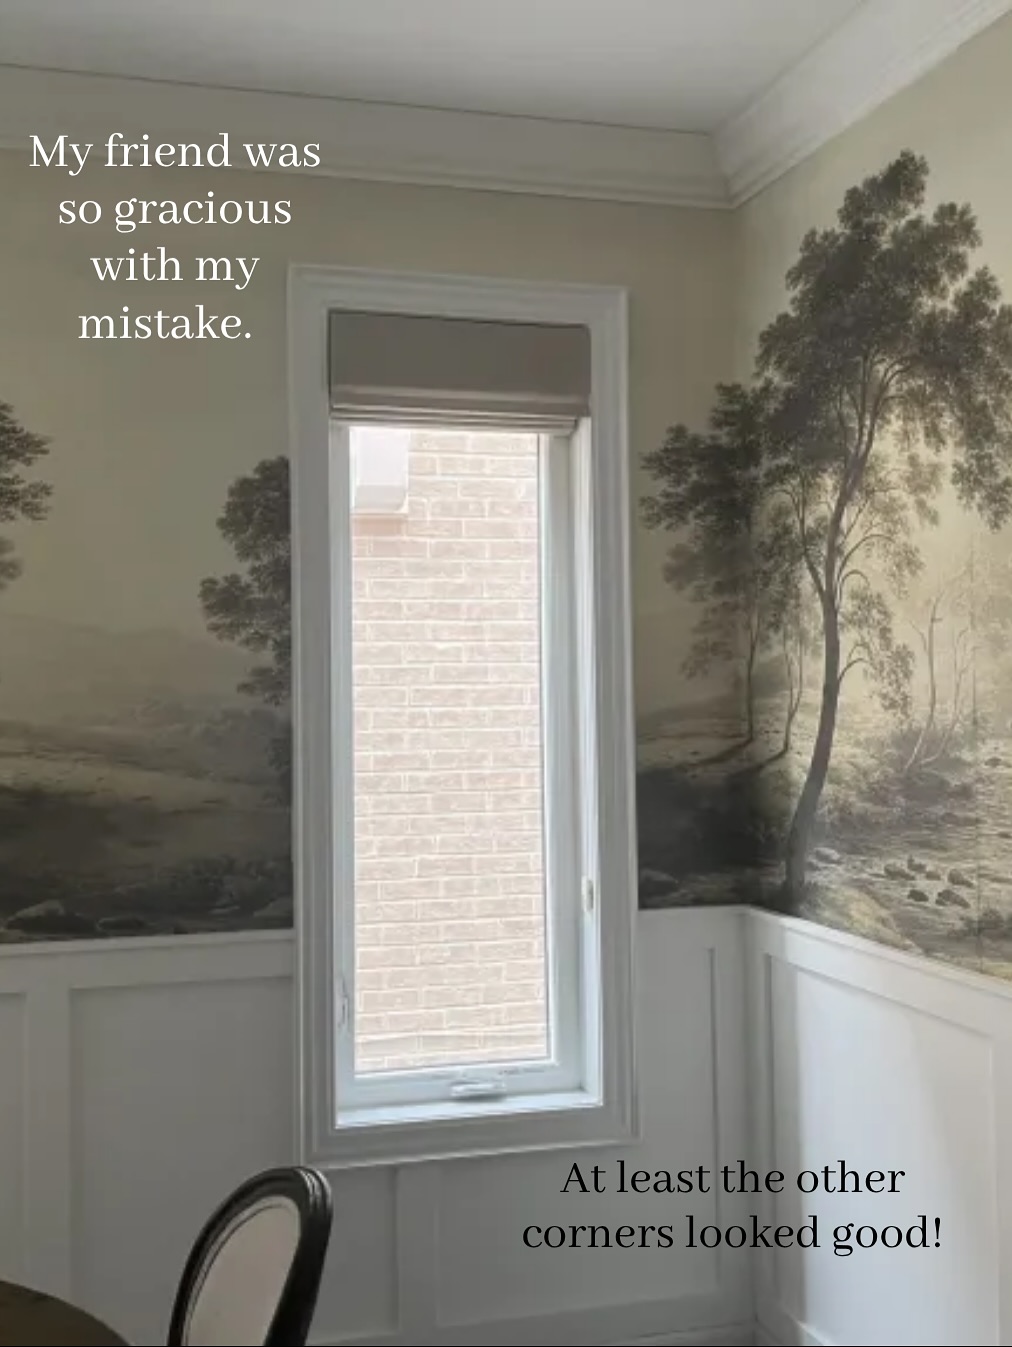
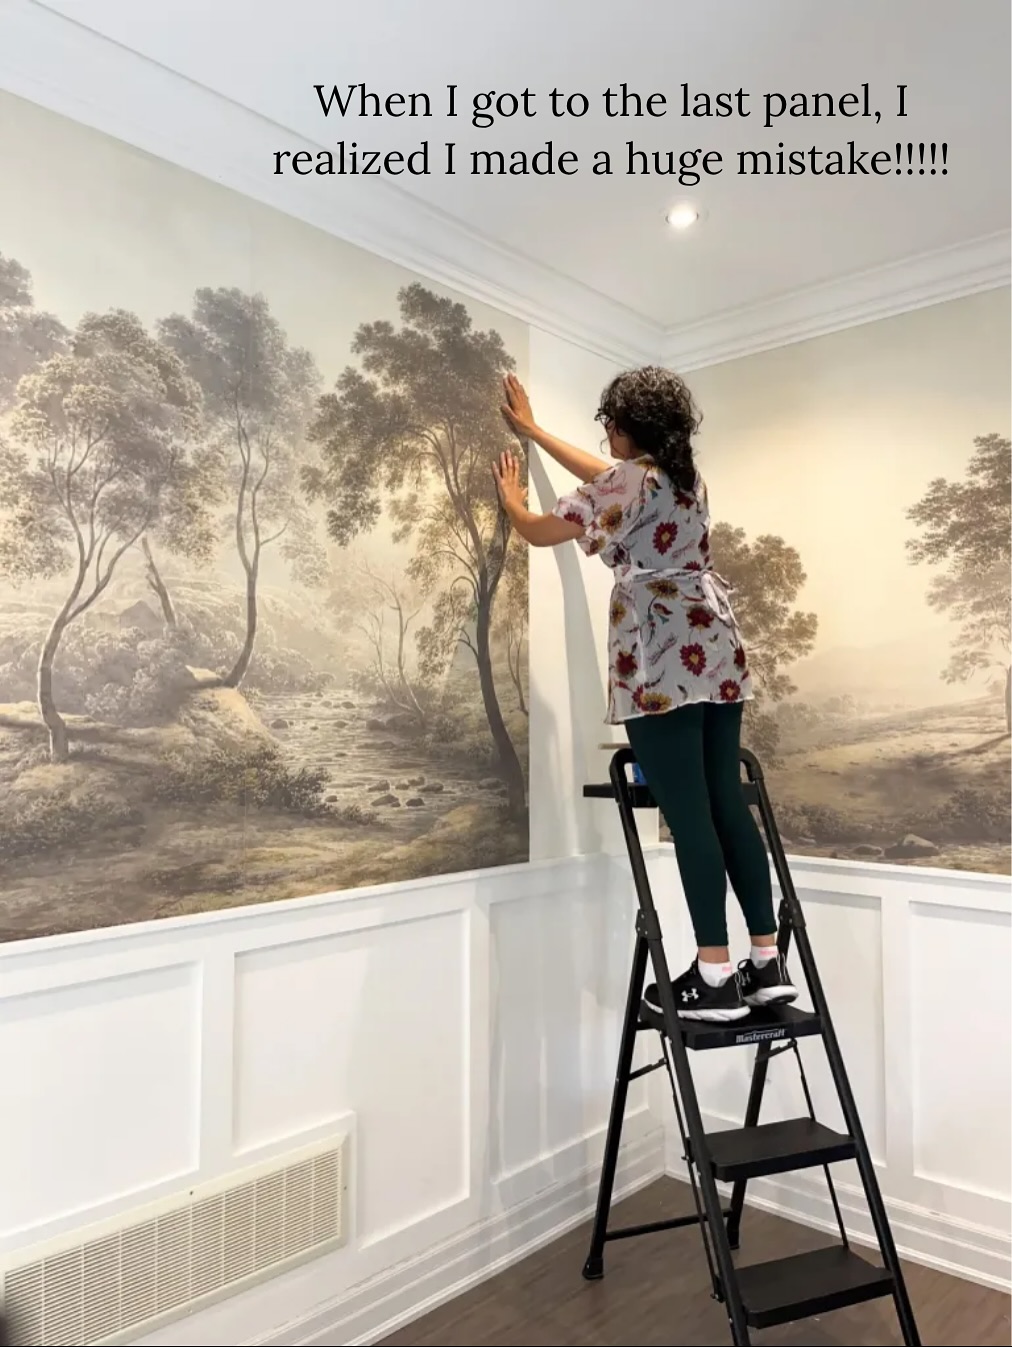
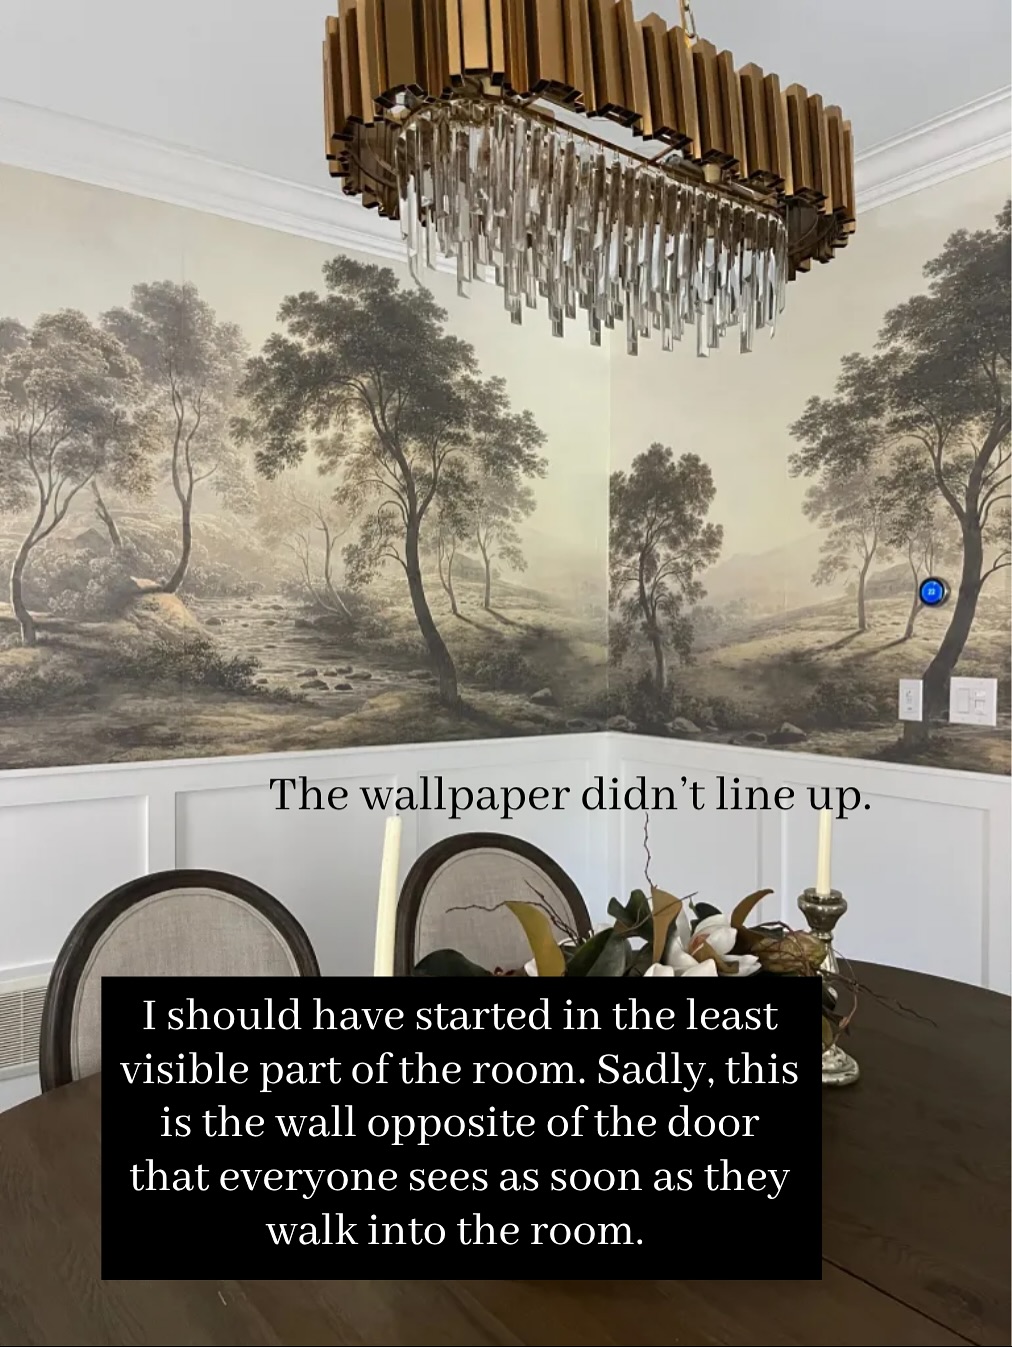
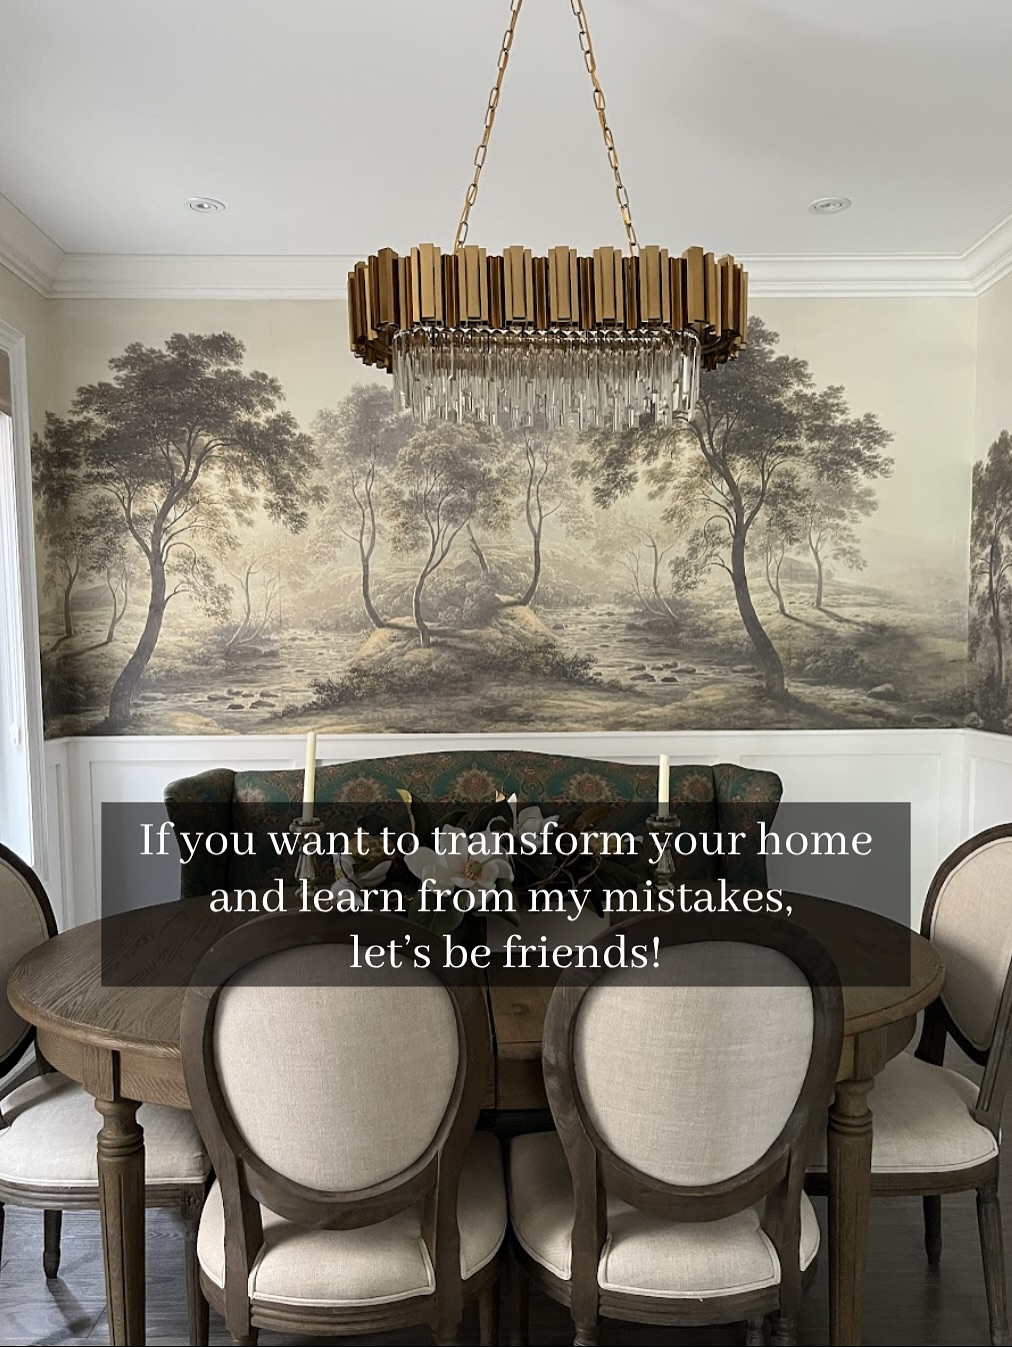
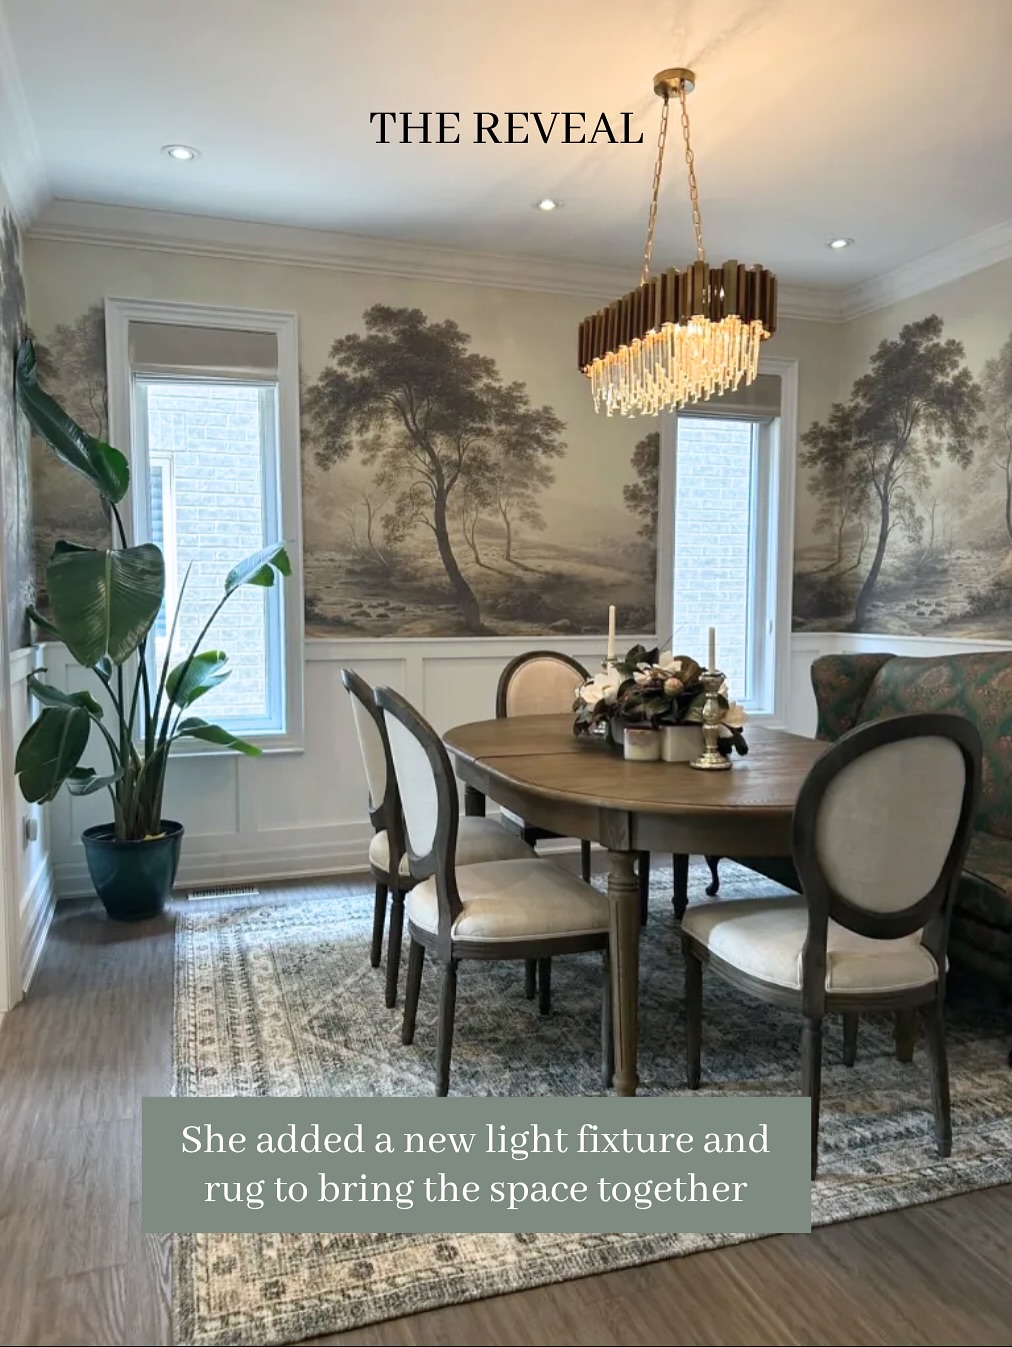
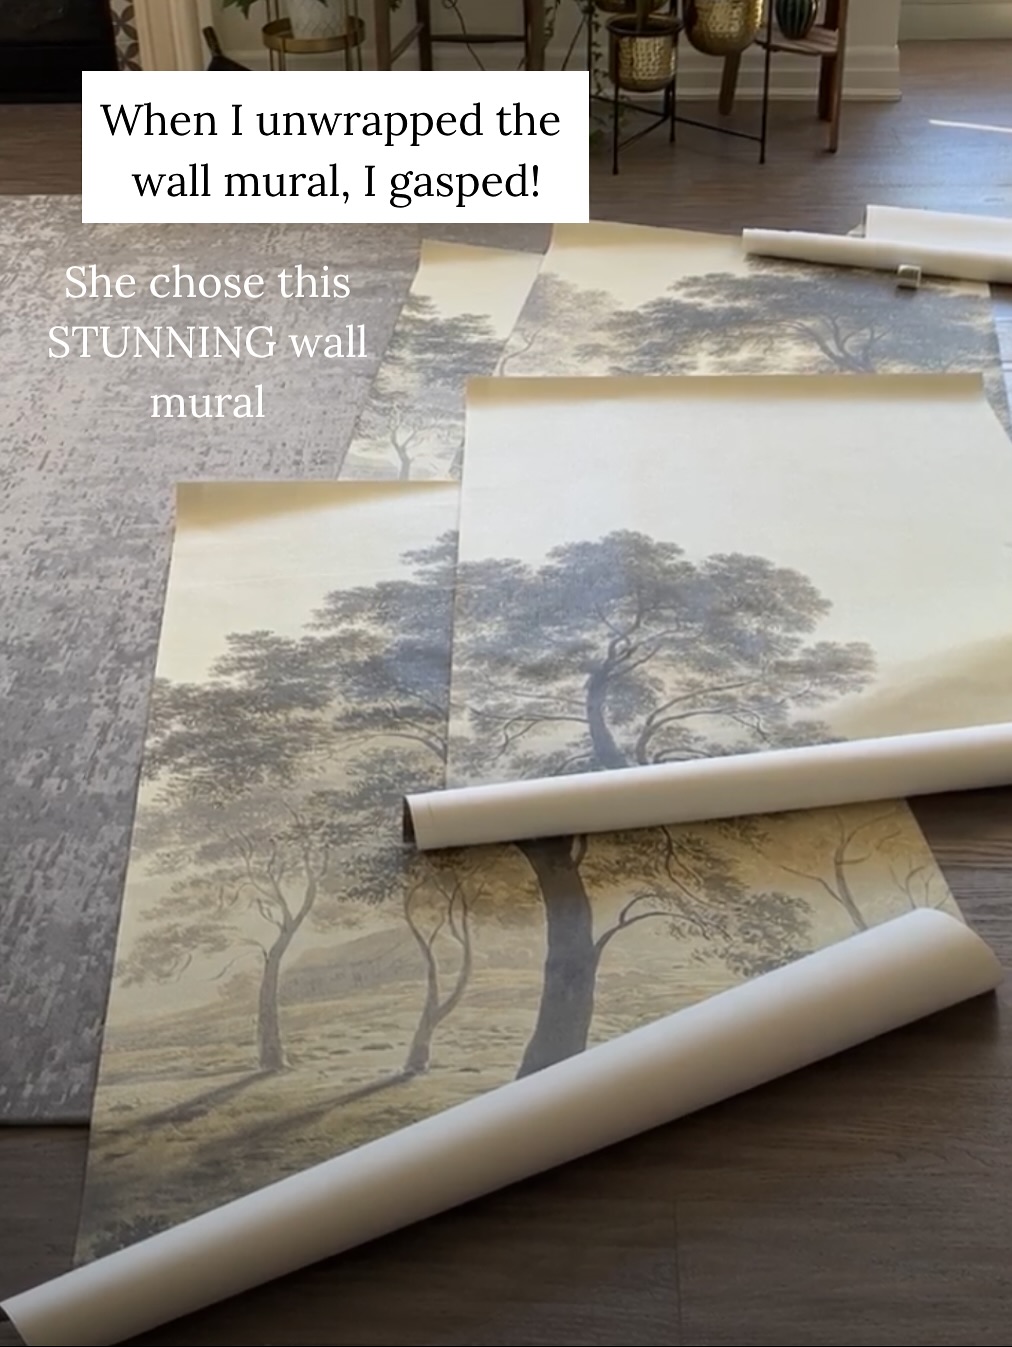
My friend’s dining room had a good base, but lacked character. She asked me install this beautiful vintage forest wallpaper in her home. I was so nervous because it was custom made. Each panel was made to measure. I actually had to measure each wall and send it in to the printer. It is a thick canvas and a paste the wall application. This means that you apply the paste directly to the wall. And you need A LOT OF PASTE. More than you think! My key tips: - Lay out the panels in the room. Start in the least visible corner of the room. Unfortunately I started in corner where the eye lands when you walk into the room - Work slowly. Line up each panel as best as you can, and avoid stretching the canvas. A laser level will be your best friend - Cut an X on the wallpaper on top of wall switches. Using a sharp utility knife, cut around the switch I love how much character this vintage inspired wallpaper added to her dining room. She has an immiculate eye for design. She swapped out the lighting and added a rug to complete the room. I hope this shows you not to be afraid to take a risk, even if you’ve never tried a project before. You may a mistake, but you’ll learn how to improve for next time. Cheers, Hana ❤️
2025-10-25
 1653
1653
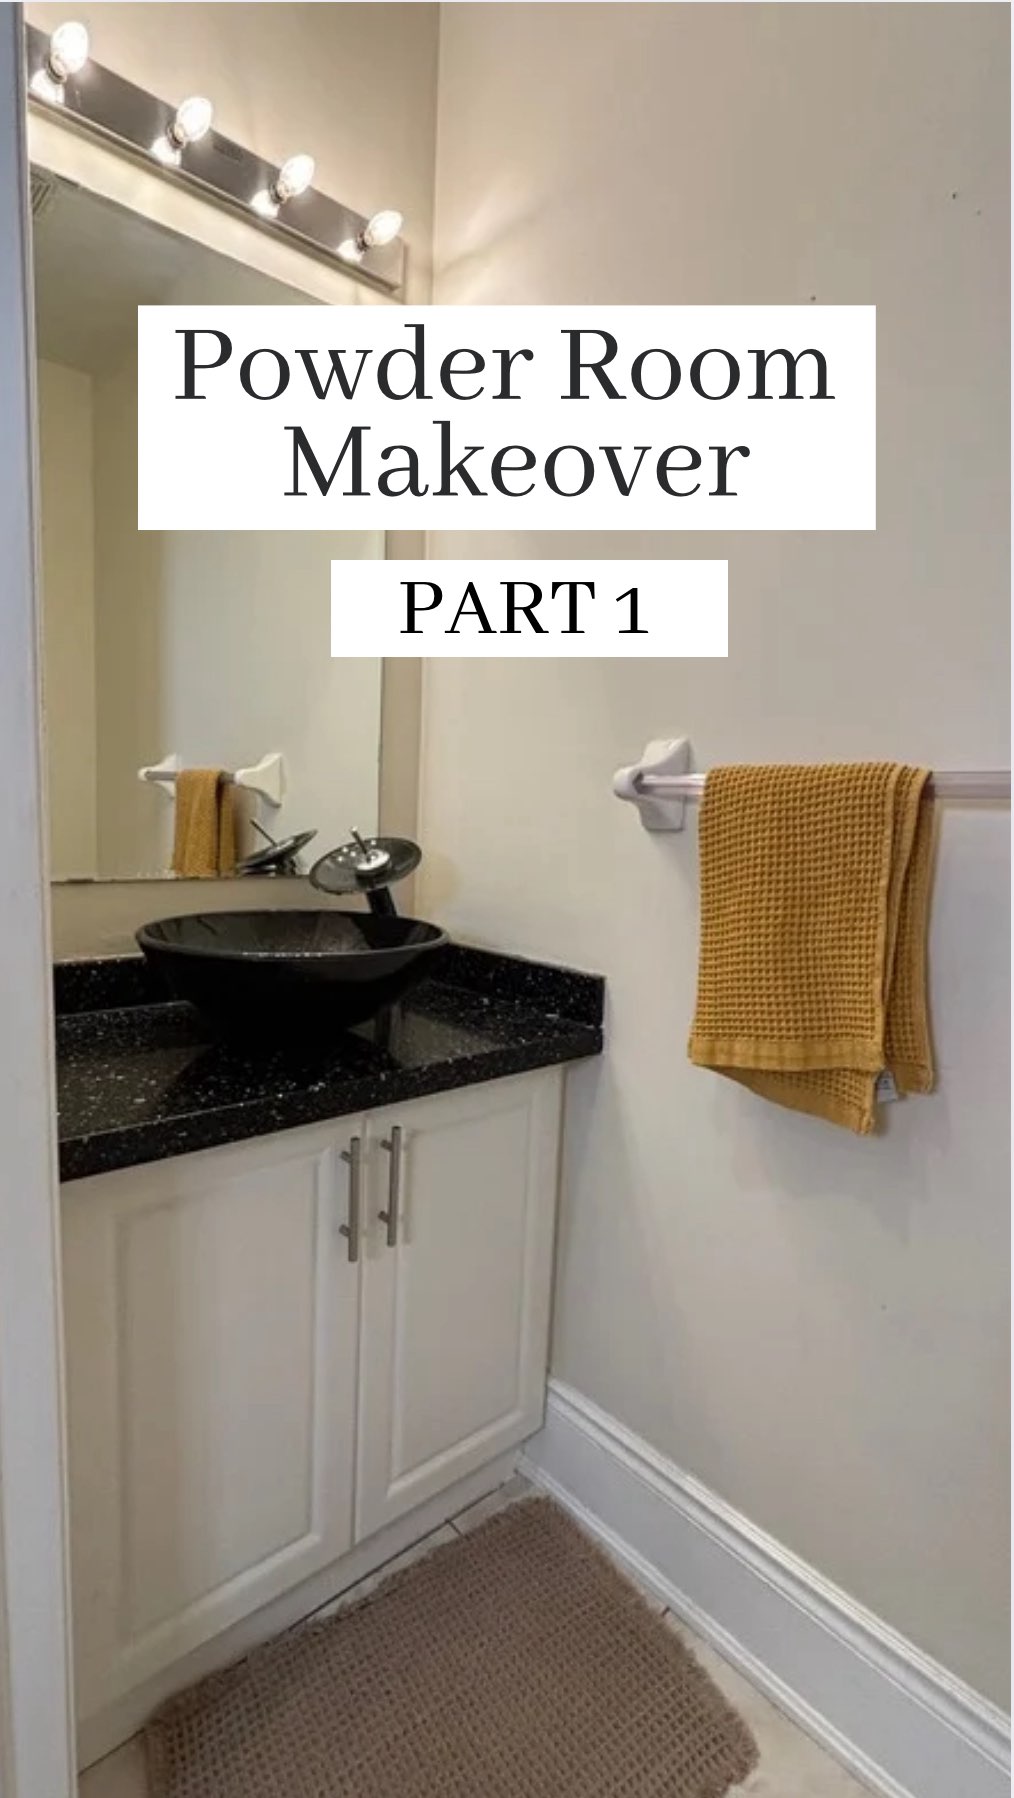
I’m sorry that the sink had to go. It definitely was an interesting conversation piece for anyone that came to our home. But no one knew how to use it ???? It reminded me of a UFO ???? ???? Now that it’s gone, I gotta pick a wallpaper for this tiny powder room makeover. Which would you pick? Neutral leaves or grandma floral?
2025-10-25
603

This is how I transformed my kitchen island!! My island had these two awkward overhangs, and there isn’t enough room in our kitchen to have stools. I had this idea to add storage underneath the overhangs for so long! I started by trying to build all my own cabinets and drawers. It was really time-consuming but I was able to build almost all of them. I did end up buying one IKEA cabinet and cutting the depth down for the cans. Initially, I was going to re-stain old honey old cabinets, but that didn’t work out, so I’m really glad that I was able to find these walnut door fronts at IKEA. Plus, they are really affordable. I knew I wanted to make the island a little bit more fancy so I used pole wrap around the edges. I installed it with construction adhesive and then I nailed them with a pin nailer. I love the dark wood look of the island, but the storage is even better!!! I added drawers opposite to my dishwasher so emptying the dishwasher is a breeze. I have a pull out drawer for water bottle bottles, and a special spot for baking trays and cutting boards. Since the overhang was really shallow on the other side of the island, I added a cabinet for canned goods. I love how this island turned out! If you’re looking for more budget kitchen ideas stay tuned!! I’m just getting started on my dream kitchen on a budget!
2025-10-25
2491
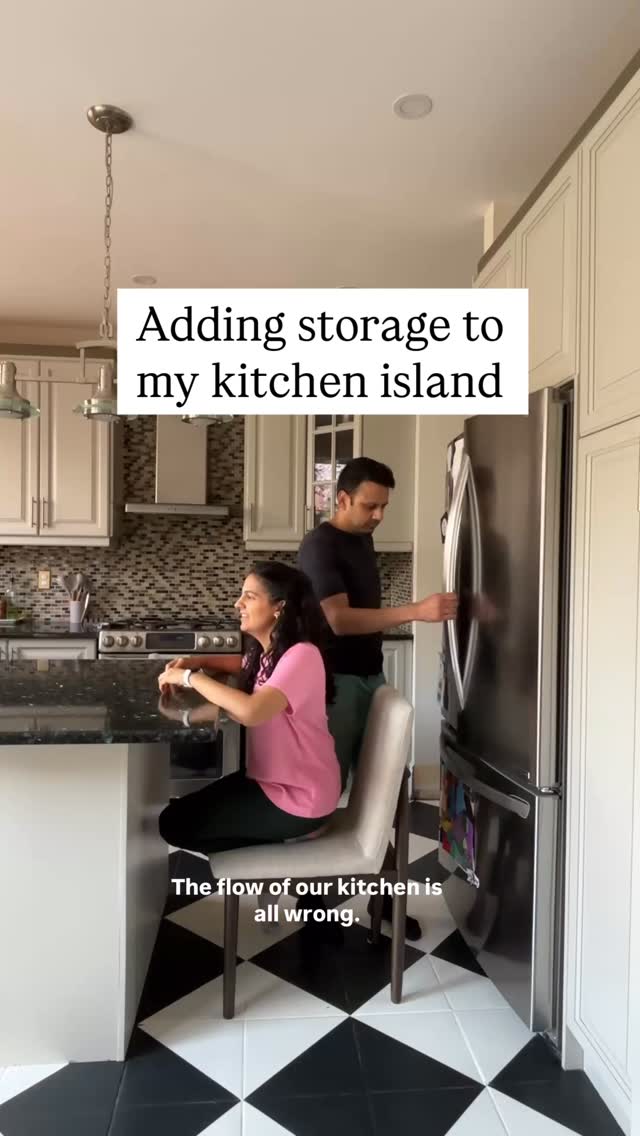
I thought adding storage to our island would be so easy! I start off by building drawers in cabinets, which may look easy but it’s really precise work and you have to make sure everything is level… But since I’m doing this budget makeover, I wanted to make sure that the doors were really inexpensive and I hit the jackpot when I got these $5 doors, but it wasn’t that easy to re-stain them And since I’m really stubborn and want the look of a dark wood island, I didn’t want to just paint the doors. But I got really lucky because IKEA sells a walnut door finish!! And this is the solution that I’ve been waiting for! Stay tuned to see how the rest of the island turns out.
2025-10-25
1577
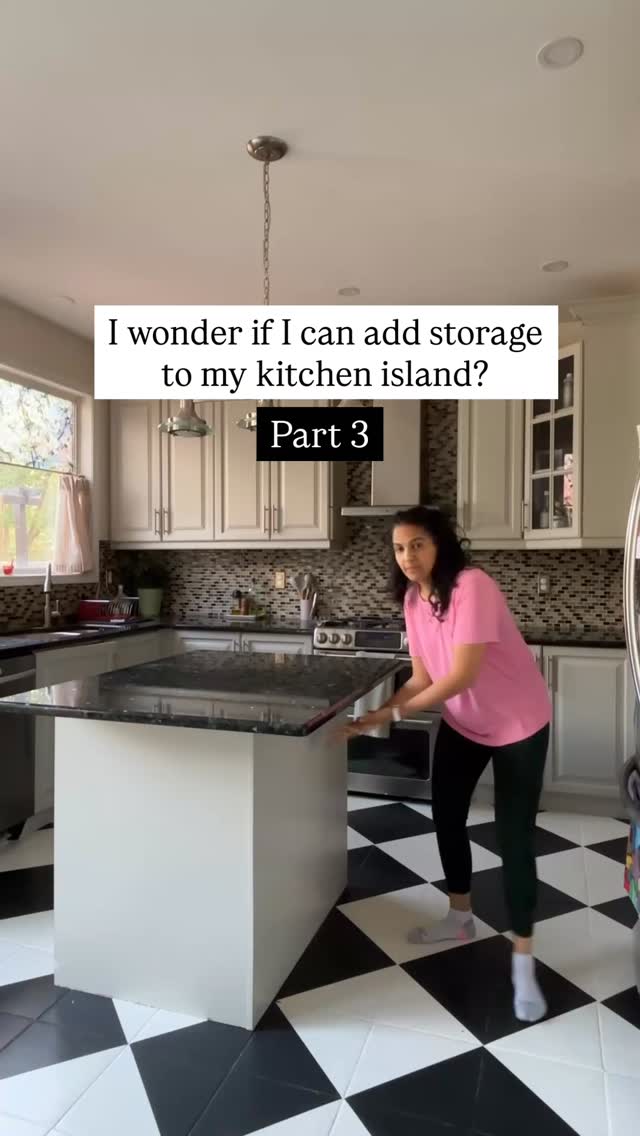
I wonder if I can add IKEA doors to existing cabinets? This little project started when I decided to add storage to the awkward overhangs on my island. At first, I was going to retrofit honey oak doors, but since I couldn’t get the stain right, I opted to use affordable IKEA cabinet doors. This is a budget kitchen makeover. The cabinet was 1/2” too small, and no matter how I tried to adjust the doors, they would not close. That meant the IKEA doors I wanted to use weren’t going to line up. The reason I built my own cabinet in the first place is because IKEA doesn’t sell very shallow cabinets. SO…. I ended up cutting down IKEA cabinet to make it more shallow ???? If you ever need to cut down an IKEA cabinet depth: - Make sure you discard the back part with the groove for the back panel. That’s the part with the groove where the MDF backing slides in. You’ll definitely want to keep the front part as that’s where the holes for the door hinges go. - Reinforce the cabinet box with a few extra screws once it’s cut — you’re basically rebuilding the structure a bit, and you’ll want it solid before you hang doors on it. Once I got everything installed, the IKEA doors went on perfectly (a small DIY miracle)!!!!! And for the last little cabinet, I used a drawer front turned vertically as a door. Since it was a drawer front, it doesn’t have holes for hinges. I gained a lot of other storage so I decided to forfeit this one. Honestly, this whole project has been a struggle, but I’m so happy to finally be at this point. It’s starting to look like a real built-in piece, and next I’ll be wrapping the sides in pole wrap to finish it off. Stay tuned — this one’s been a wild rollercoaster!
2025-10-25
1314

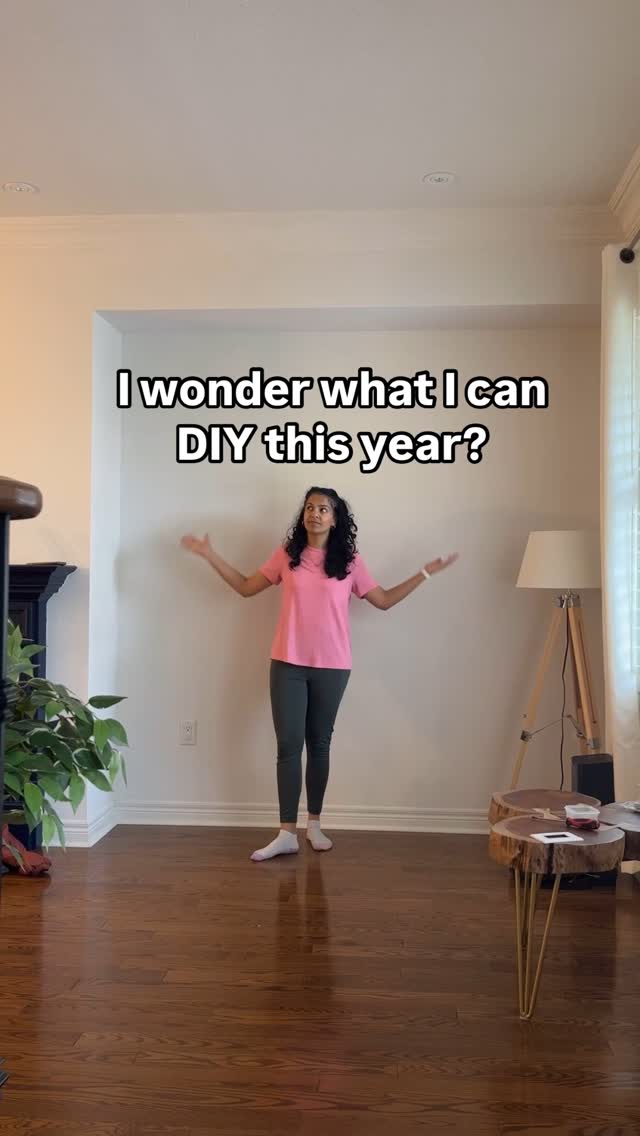
2024 DIY RECAP This recap makes me realize how much I accomplished this year. Not to mention moving from our starter townhouse, which I prayed for and dreamed about for YEARS ???????? Before I start planning my 2025 projects, I told myself to take a moment and celebrate 2024. Which one of these is your favourite project? As this year comes to a close, I’m so thankful that you cheered me on in this journey. This page has always been about empowering you to start your first (or next) project! I love showing my mistakes because it makes you realize that most problems are solvable. Cheers, Hana ❤️
2025-10-09
14560


One of my fav hobbies? Thrifting! I’m down to find things at marketplace, on the side of the road, at the thrift store, or even my mom‘s garage! It makes your home look much more collected and unique! Which of these is your fav thrift finds?
2025-10-09
264


My mom’s bedroom reveal! While my mom was away, I decided to surprise her with a bedroom makeover in her new home. I showed her a few inspiration photos and hinted there might be a surprise waiting for her when she gets back from vacation. She recently downsized from our family home, after my dad passed away. I’ll miss our old home so much. I did projects with my dad there and learned so much alongside him. That home was so special. It was filled with holiday memories, loud grandkids, and so much love. I wanted to help my mom find comfort in her new home. So I decided to give her bedroom a makeover. I wanted her room to be really pretty with a gorgeous blue. I sampled lots of blue paints, but landed on Santorini Blue 1634 by @benjaminmoore. I used Benjamin Moore Regal Select Interior on the walls. I love the coverage. I painted this room so quickly! My love language has got to be trim work, so I added trim to really elevate the room. New paint, trimwork, and lots of late nights. All in the hope that she would walk in and feel at home. She was so surprised, but the first thing she said was how much she loved the color! I hope this is a beautiful beginning in her new home ???? ♥️ #ad #benjaminmoore #benjaminmoorepartner, bedroom makeover, blue paint, budget makeover
2025-10-09
4450

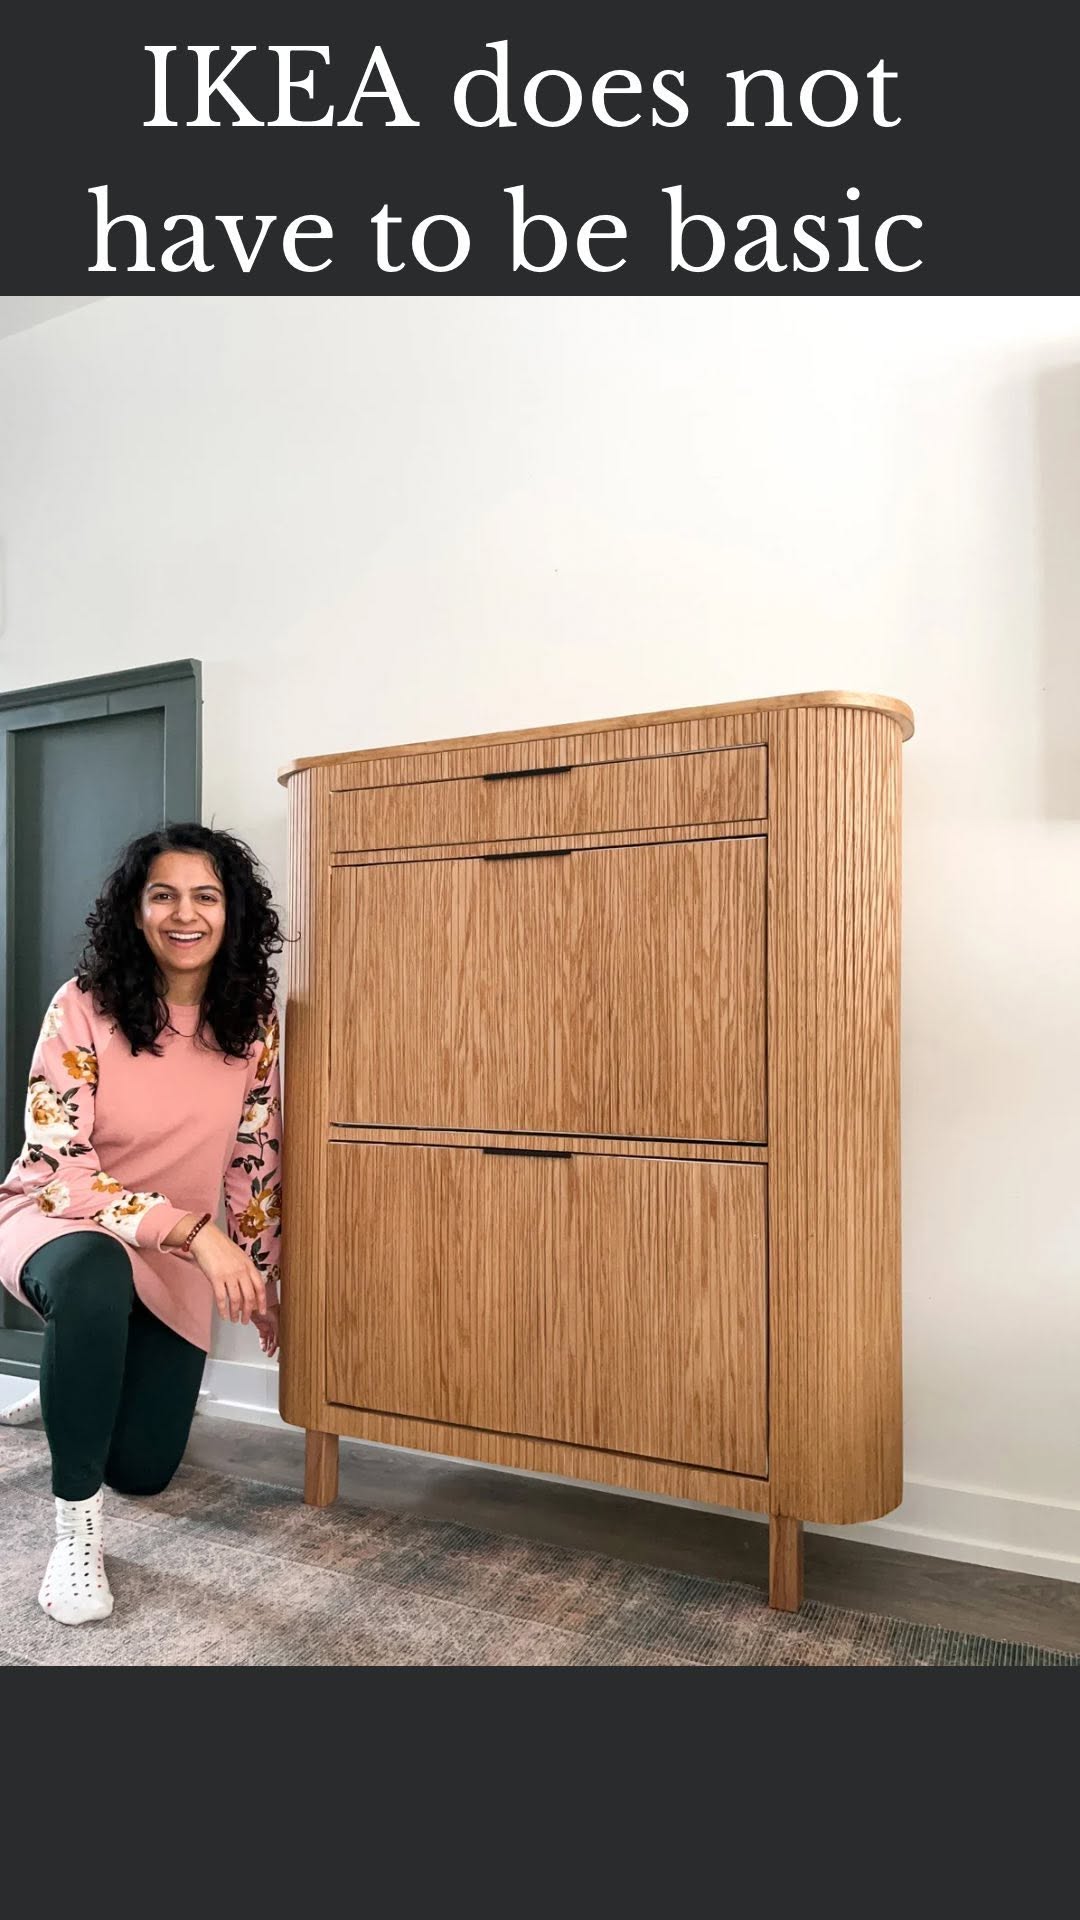
If you’re looking to make IKEA look high end, I am so glad you found me! I love the functionality of IKEA like this IKEA HEMNES shoe cabinet. It is a slim profile show cabinet perfect for a small entryway. I added pole wrap to give it a high end look Follow along if you love IKEA hacks! IKEA hacks, small entryway, pole wrap, #polewrap #ikeahack
2025-10-09
81401